简介
设置树莓派引导FIT镜像格式的linux,顺带验证FIT打包压缩的arm64的linux镜像
uboot配置
uboot需要打开CONFIG_FIT配置,然后剩下的其他的FIT配置会帮你自动勾上,就不操心了
kernel镜像打包
arm64 kernel默认只支持gzip压缩算法,产物有Image跟Image.gz

要打包FIT的镜像,我们需要由一个its文件来描述
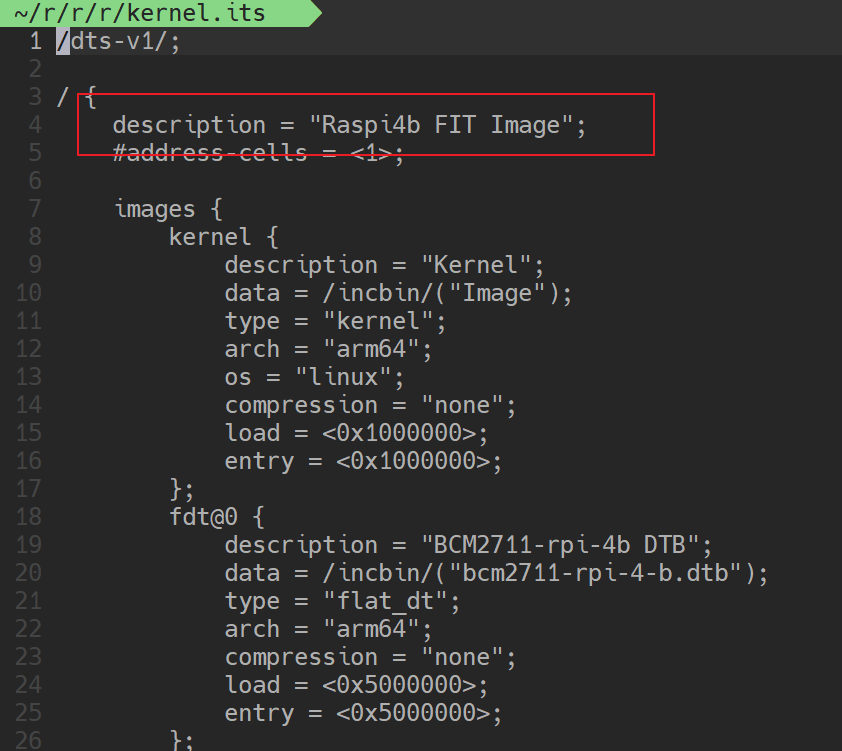
如果我们打包的是没有压缩的镜像,则its文件如下
/dts-v1/;

/ {
    description = "Raspi4b FIT Image";
    #address-cells = <1>;

    images {
        kernel {
            description = "Kernel";
            data = /incbin/("Image");
            type = "kernel";
            arch = "arm64";
            os = "linux";
            compression = "none";
            load = <0x1000000>;
            entry = <0x1000000>;
        };
        fdt@0 {
            description = "BCM2711-rpi-4b DTB";
            data = /incbin/("bcm2711-rpi-4-b.dtb");
            type = "flat_dt";
            arch = "arm64";
            compression = "none";
            load = <0x5000000>;
            entry = <0x5000000>;
        };
    };

    configurations {
        default = "config@0";
        config@0 {
            description = "kernel no compression";
            kernel = "kernel";
            fdt = "fdt@0";
        };

    };
};
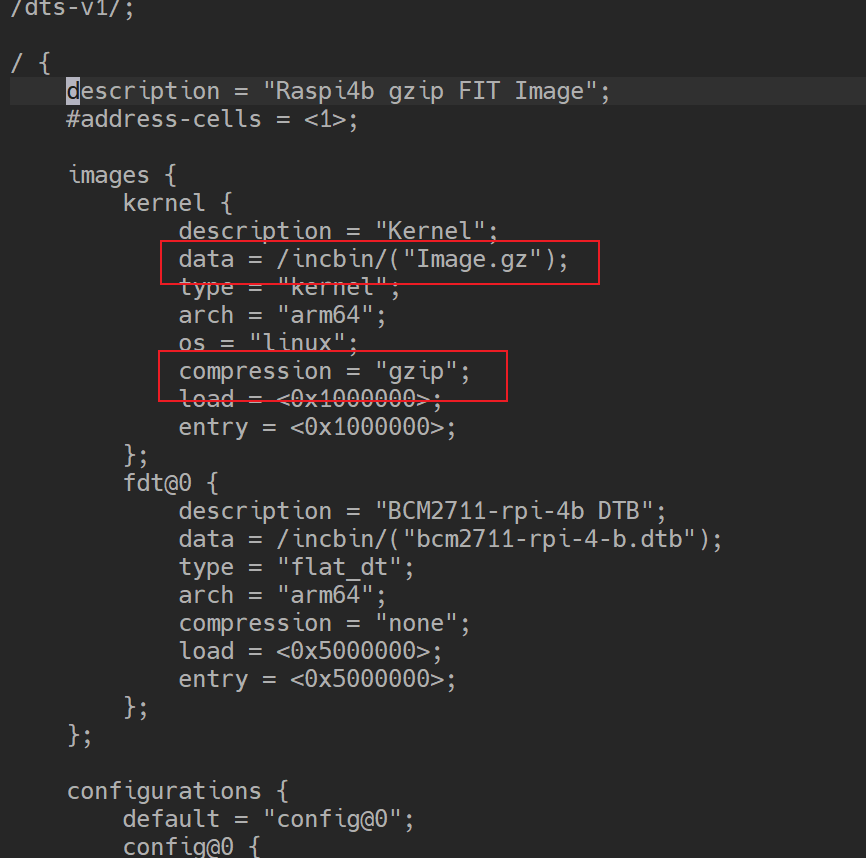
如果是打包的gzip压缩过的镜像,则its文件如下
/dts-v1/;

/ {
    description = "Raspi4b gzip FIT Image";
    #address-cells = <1>;

    images {
        kernel {
            description = "Kernel";
            data = /incbin/("Image.gz");
            type = "kernel";
            arch = "arm64";
            os = "linux";
            compression = "gzip";
            load = <0x1000000>;
            entry = <0x1000000>;
        };
        fdt@0 {
            description = "BCM2711-rpi-4b DTB";
            data = /incbin/("bcm2711-rpi-4-b.dtb");
            type = "flat_dt";
            arch = "arm64";
            compression = "none";
            load = <0x5000000>;
            entry = <0x5000000>;
        };
    };

    configurations {
        default = "config@0";
        config@0 {
            description = "kernel gzip";
            kernel = "kernel";
            fdt = "fdt@0";
        };

    };
};
压缩的重点在于此处
有了its文件后,通过mkimage工具可以生成相关的FIT格式的镜像
mkimage -f kernel-gz.its linux-gz.itb
mkimage -f kernel.its linux.itb
启动
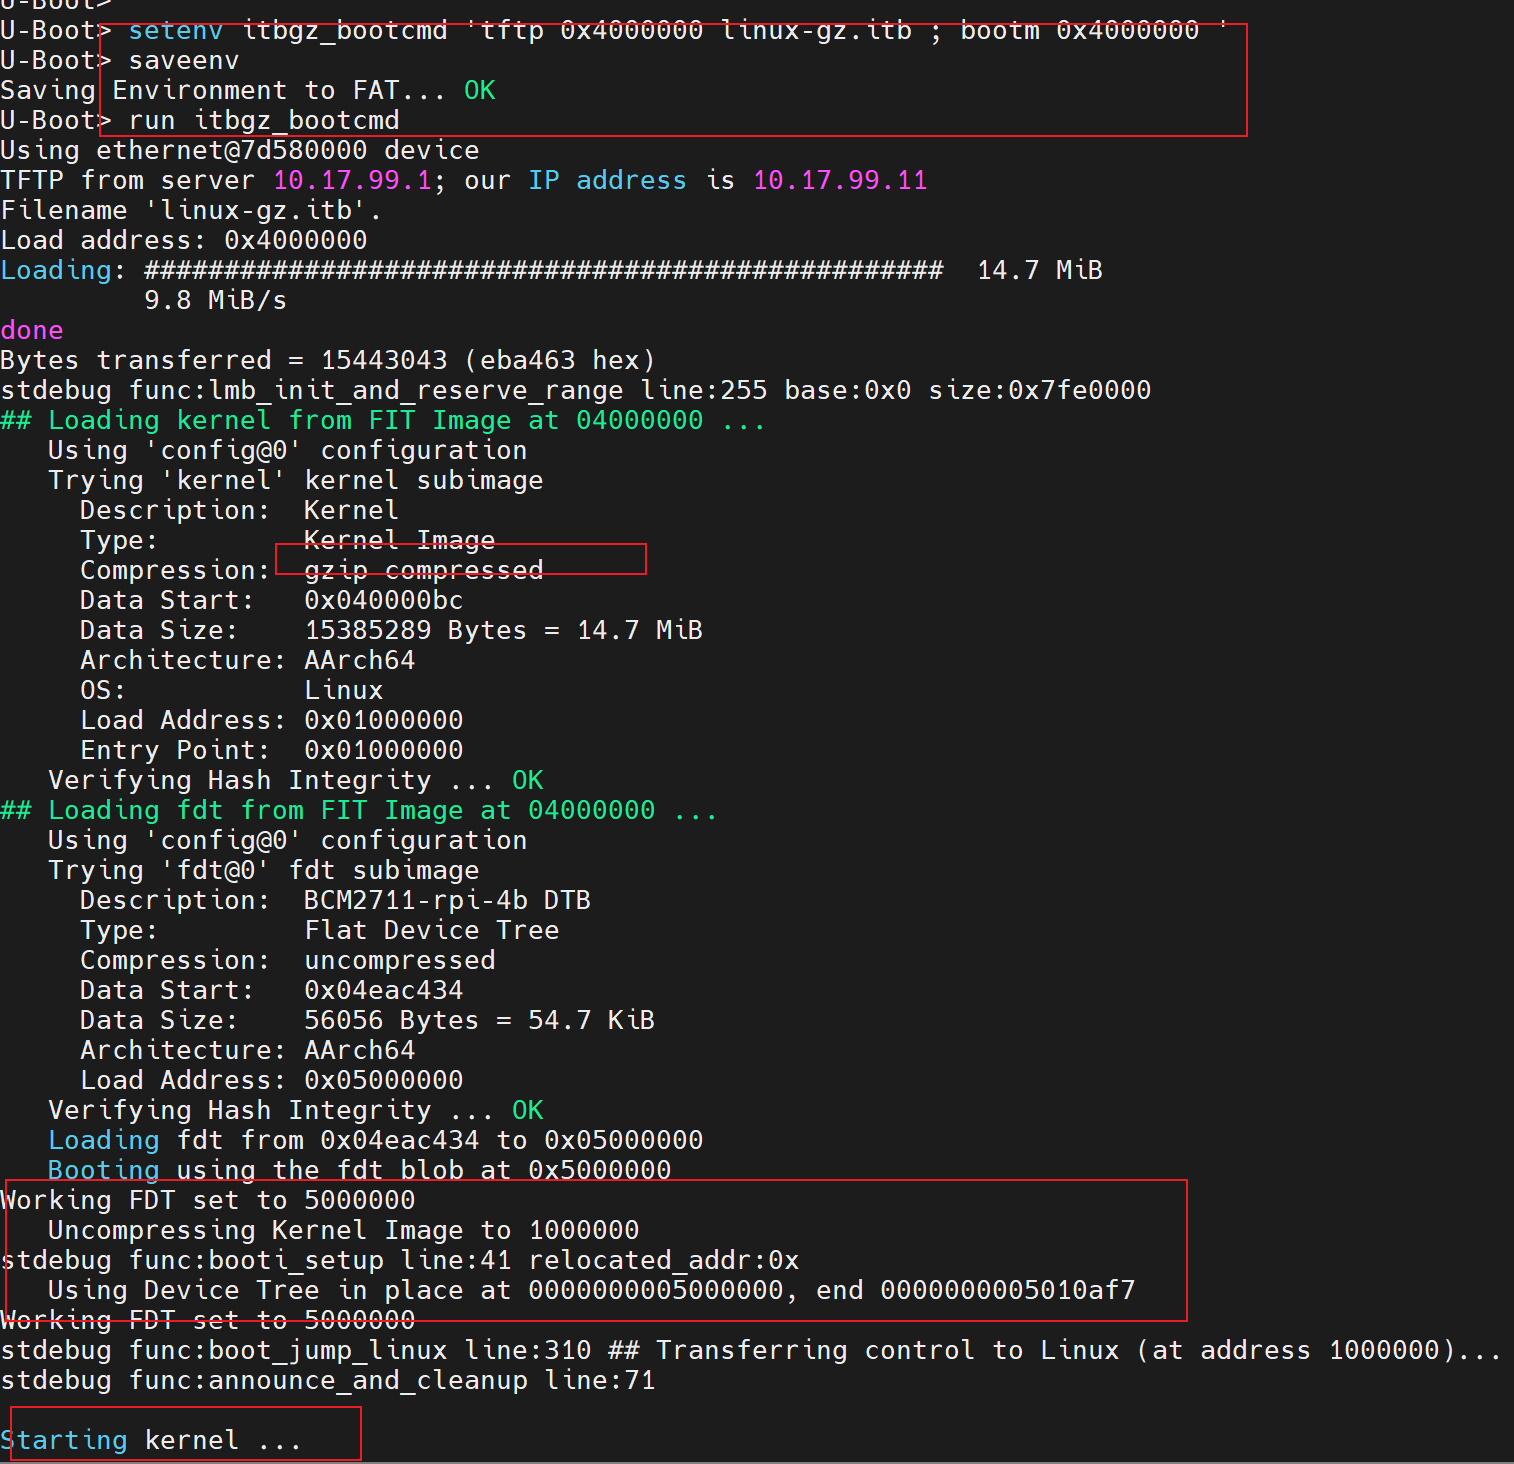
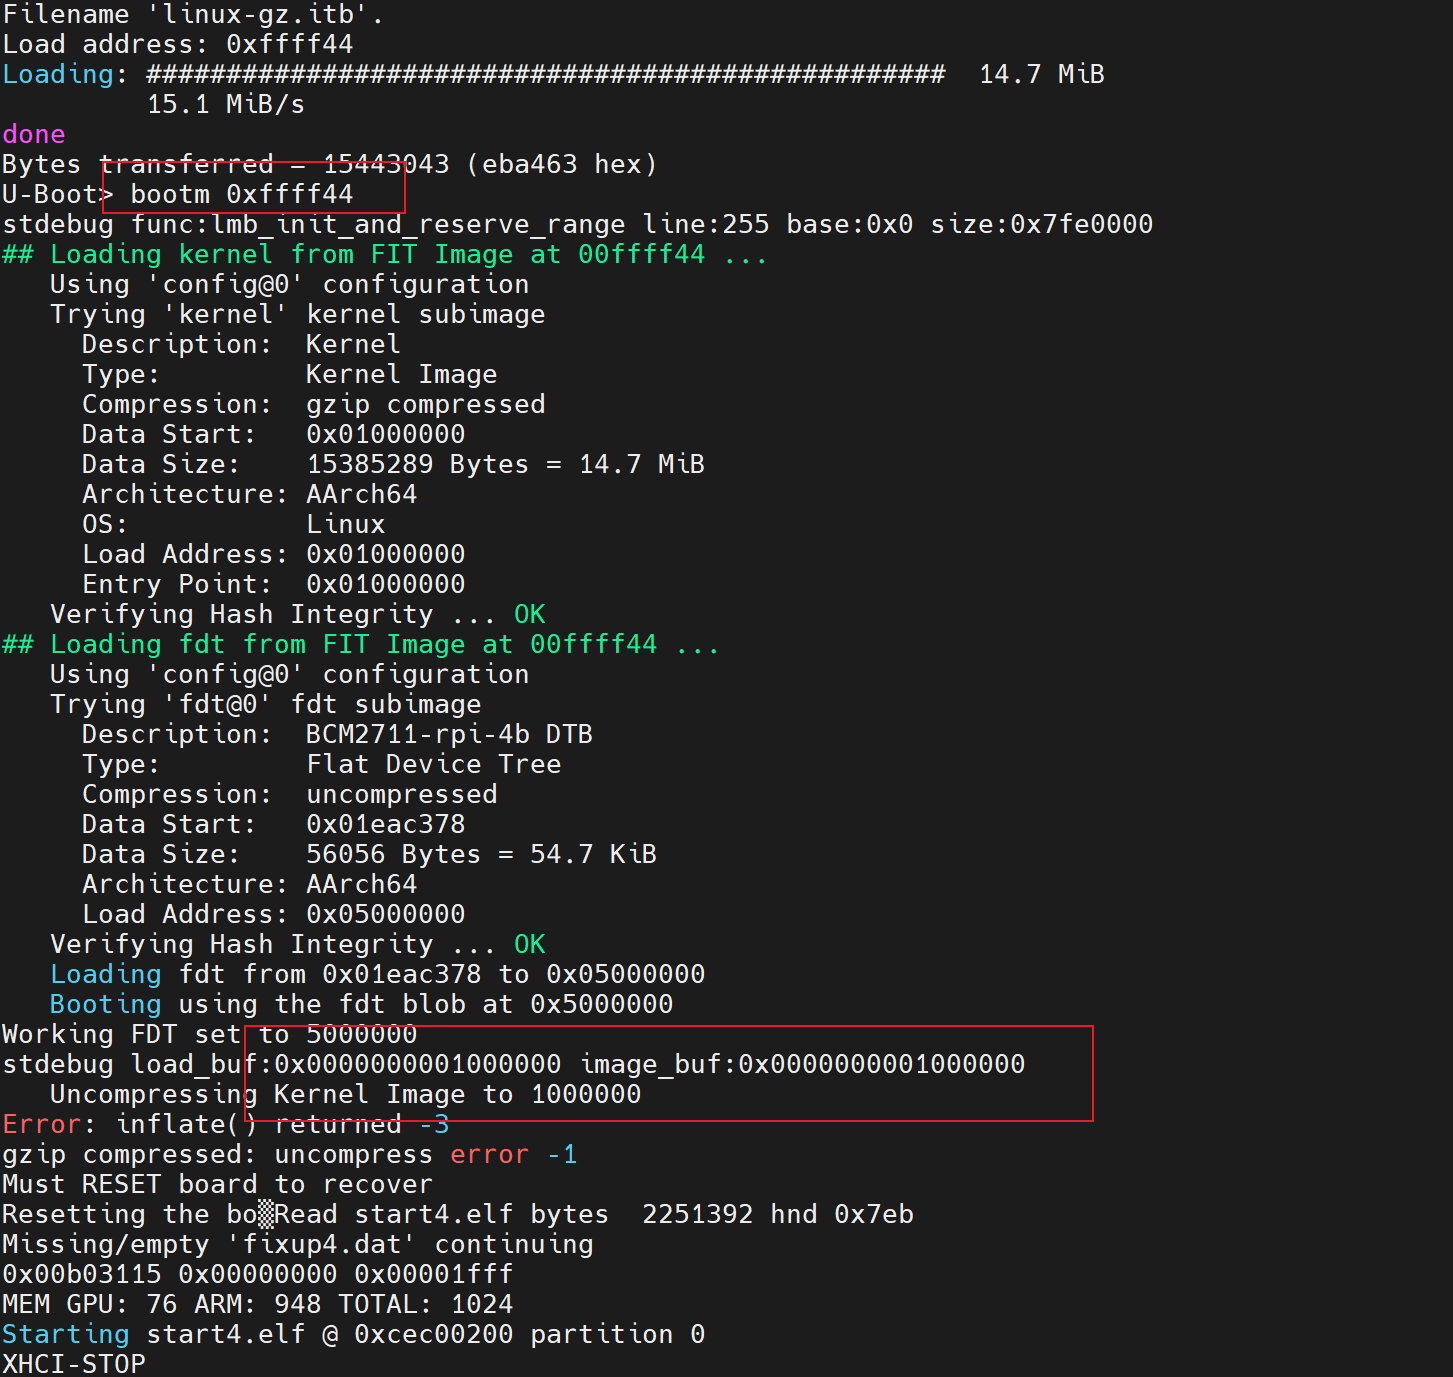
启动gzip压缩的FIT镜像,uboot设置如下,对于FIT镜像格式,bootm addr如此便可,代码中会解析到是FIT镜像的格式,自行提取跟解压
U-Boot> setenv itbgz_bootcmd 'tftp 0x4000000 linux-gz.itb ; bootm 0x4000000 '
U-Boot> saveenv
Saving Environment to FAT... OK
U-Boot> run itbgz_bootcmd
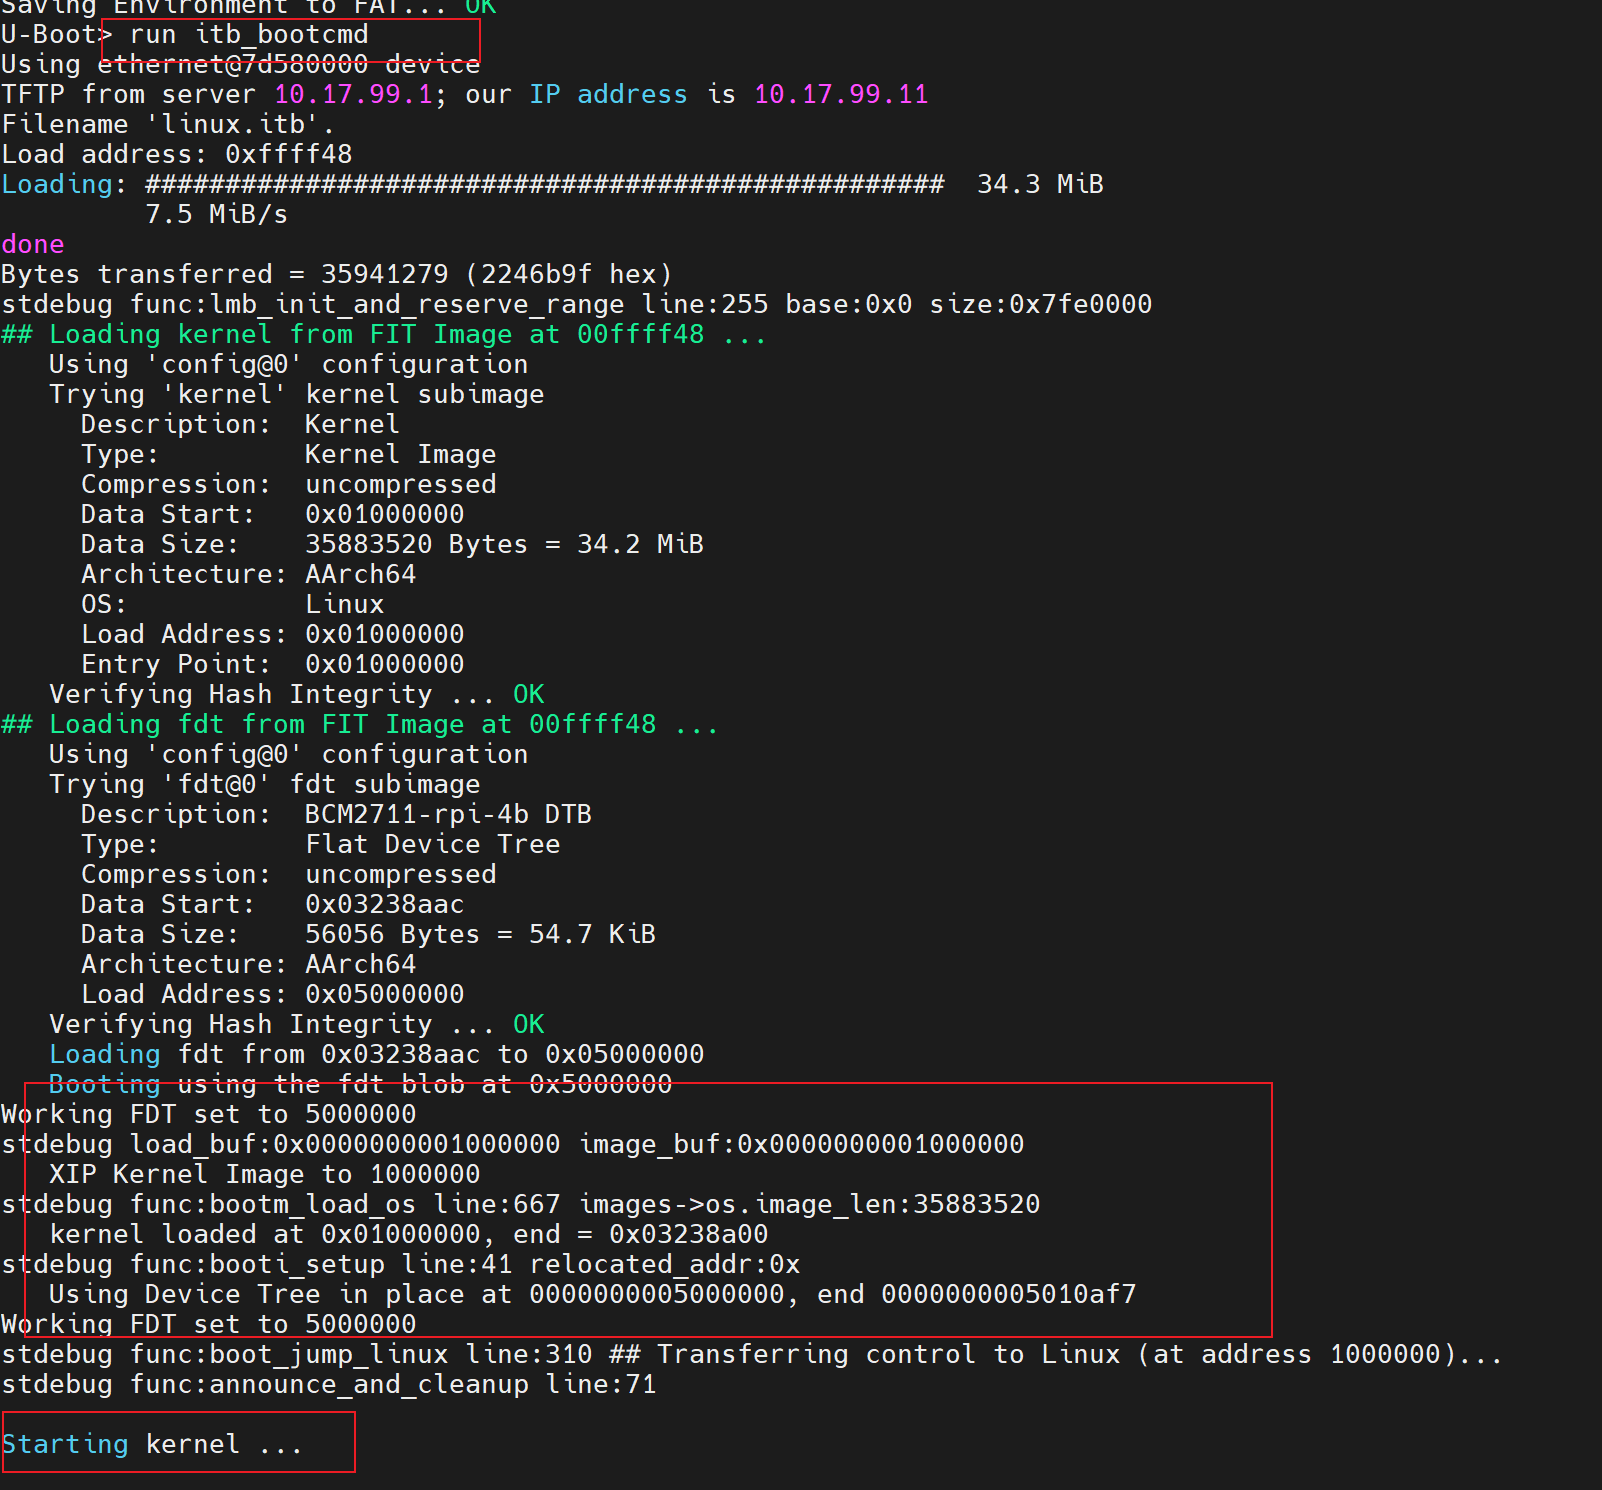
如果引导没有压缩的内核,则设置如下
U-Boot> setenv itb_bootcmd 'tftp 0xffff48 linux.itb ; bootm 0xffff48'
U-Boot> saveenv
Saving Environment to FAT... OK
U-Boot> run itb_bootcmd
多镜像打包
其实有的芯片引导流程有spl -> atf -> uboot这个过程,spl也可以引导FIT格式的uboot+atf镜像,如下面的its文件所示
/dts-v1/;
/ {
    description = "Configuration to load ATF before U-Boot";

    images {
        uboot@1 {
            description = "U-Boot (64-bit)";
            data = /incbin/("./u-boot-nodtb.bin");
            type = "standalone";
            arch = "arm64";
            os = "U-Boot";
            compression = "none";
            load = <0x48000000>;
            entry = <0x48000000>;
        };
        atf@1 {
            description = "ARM Trusted Firmware";
            data = /incbin/("bl31.bin");
            type = "firmware";
            arch = "arm64";
            os = "arm-trusted-firmware";
            compression = "none";
            load = <0x1000000>;
            entry = <0x1000000>;
        };
        fdt {
            description = "U-Boot dtb";
            data = /incbin/("./u-boot.dtb");
            type = "flat_dt";
            arch = "arm64";
            compression = "none";
        };
    };
    configurations {
        default = "config@1";
        config@1 {
            description = "atf uboot fdt image";
            firmware = "atf@1";
            loadables = "uboot@1";
            fdt = "fdt";
        };
    };
};
如何确定load的地址
在调试的时候碰到如下问题
ERROR: new format image overwritten - must RESET the board to recover
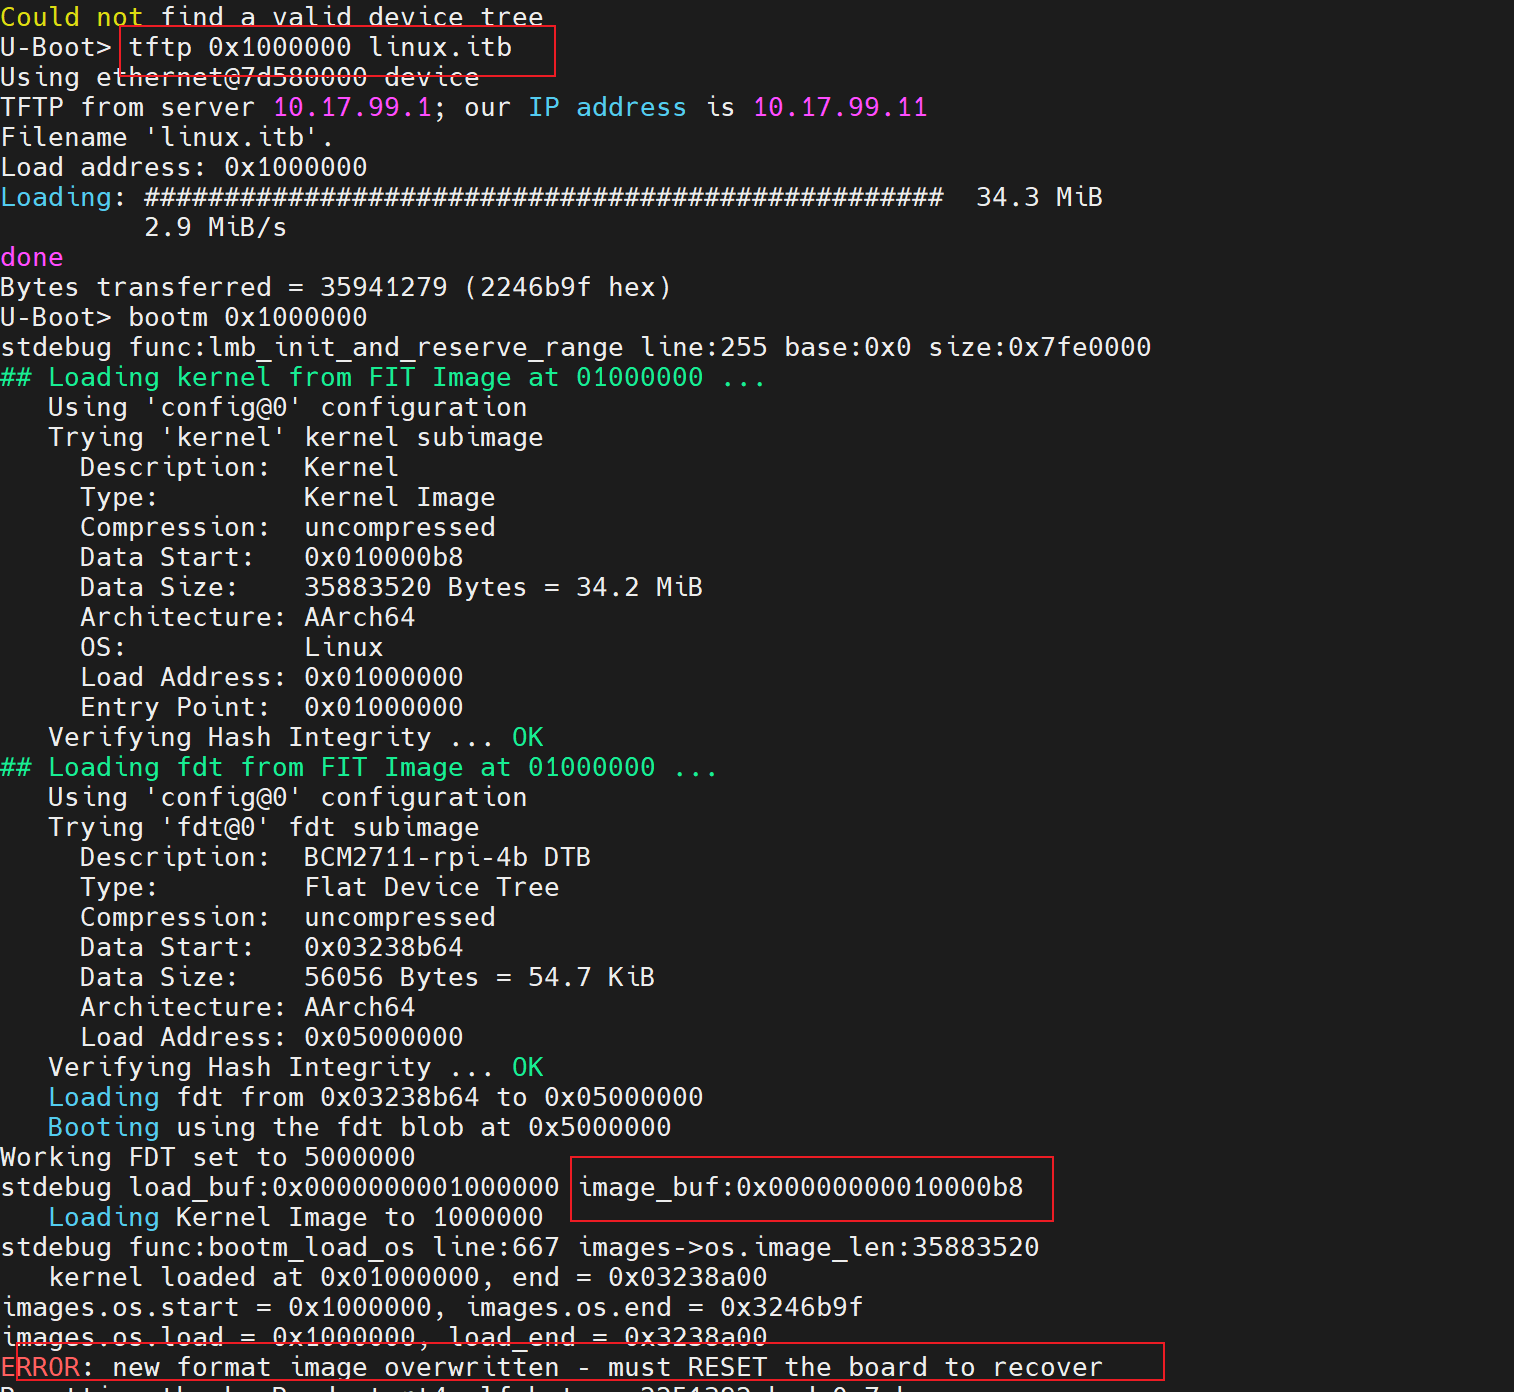
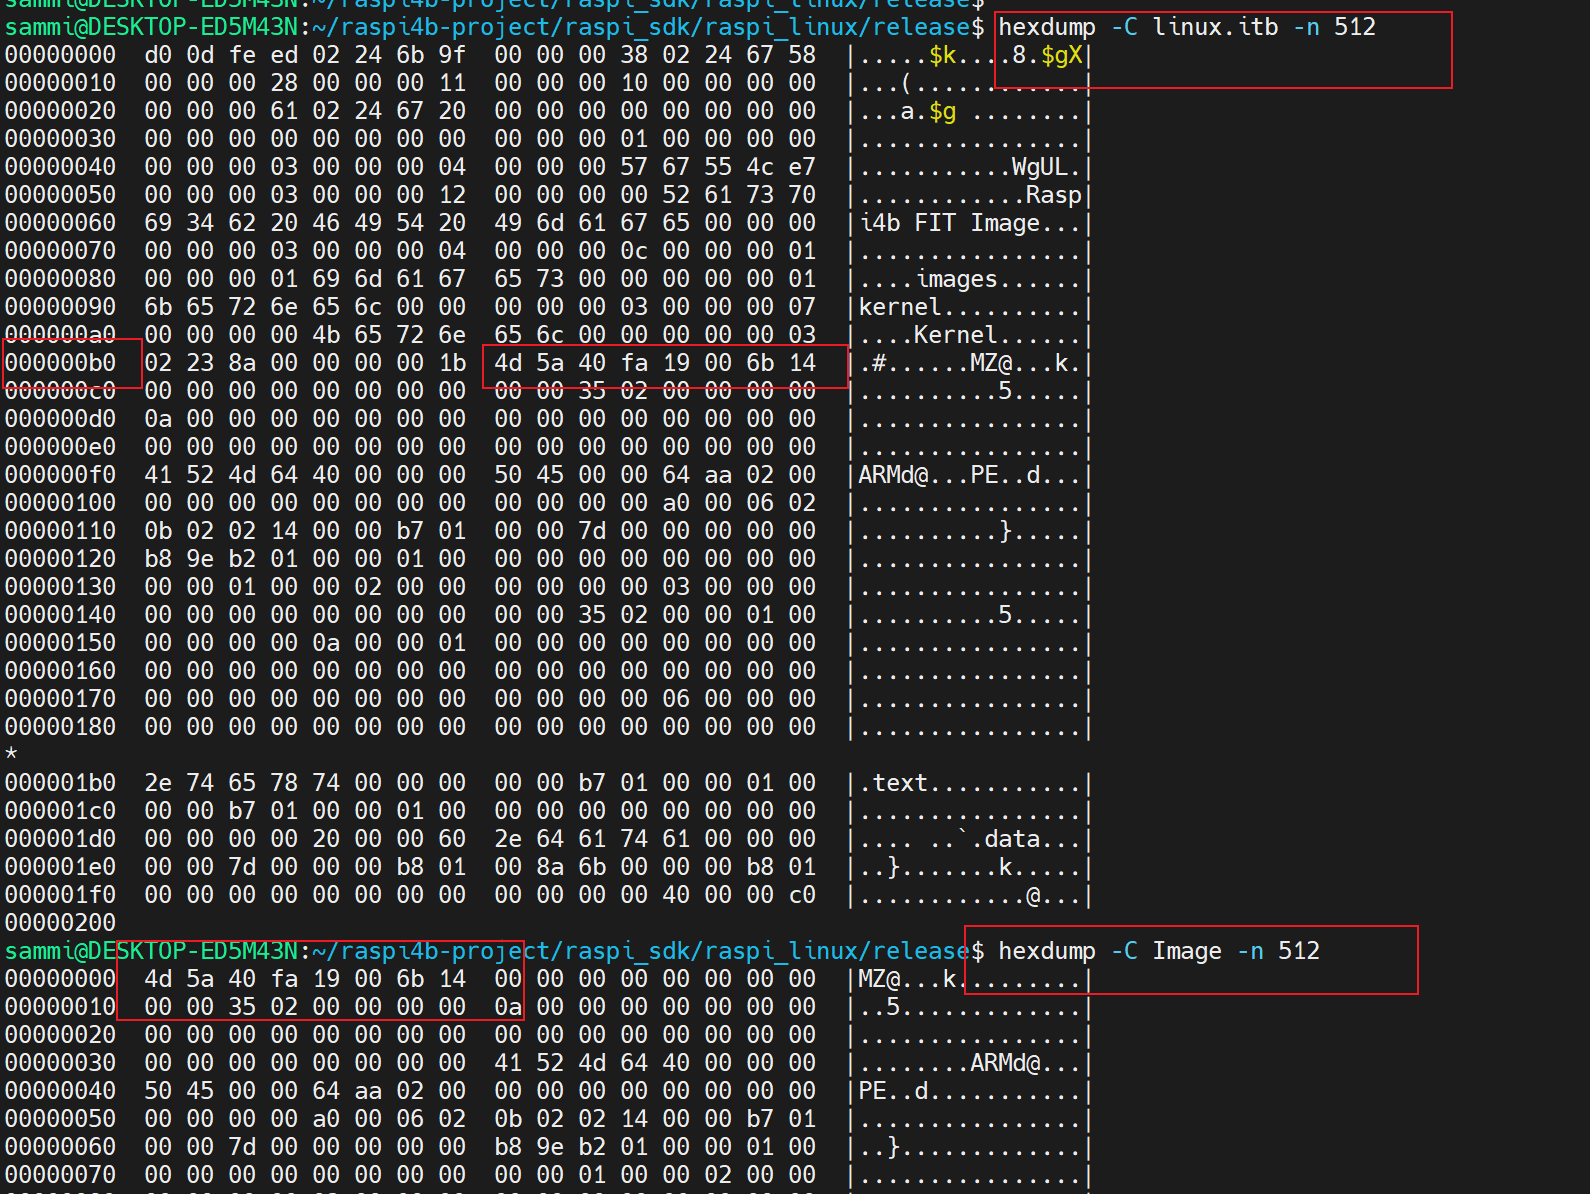
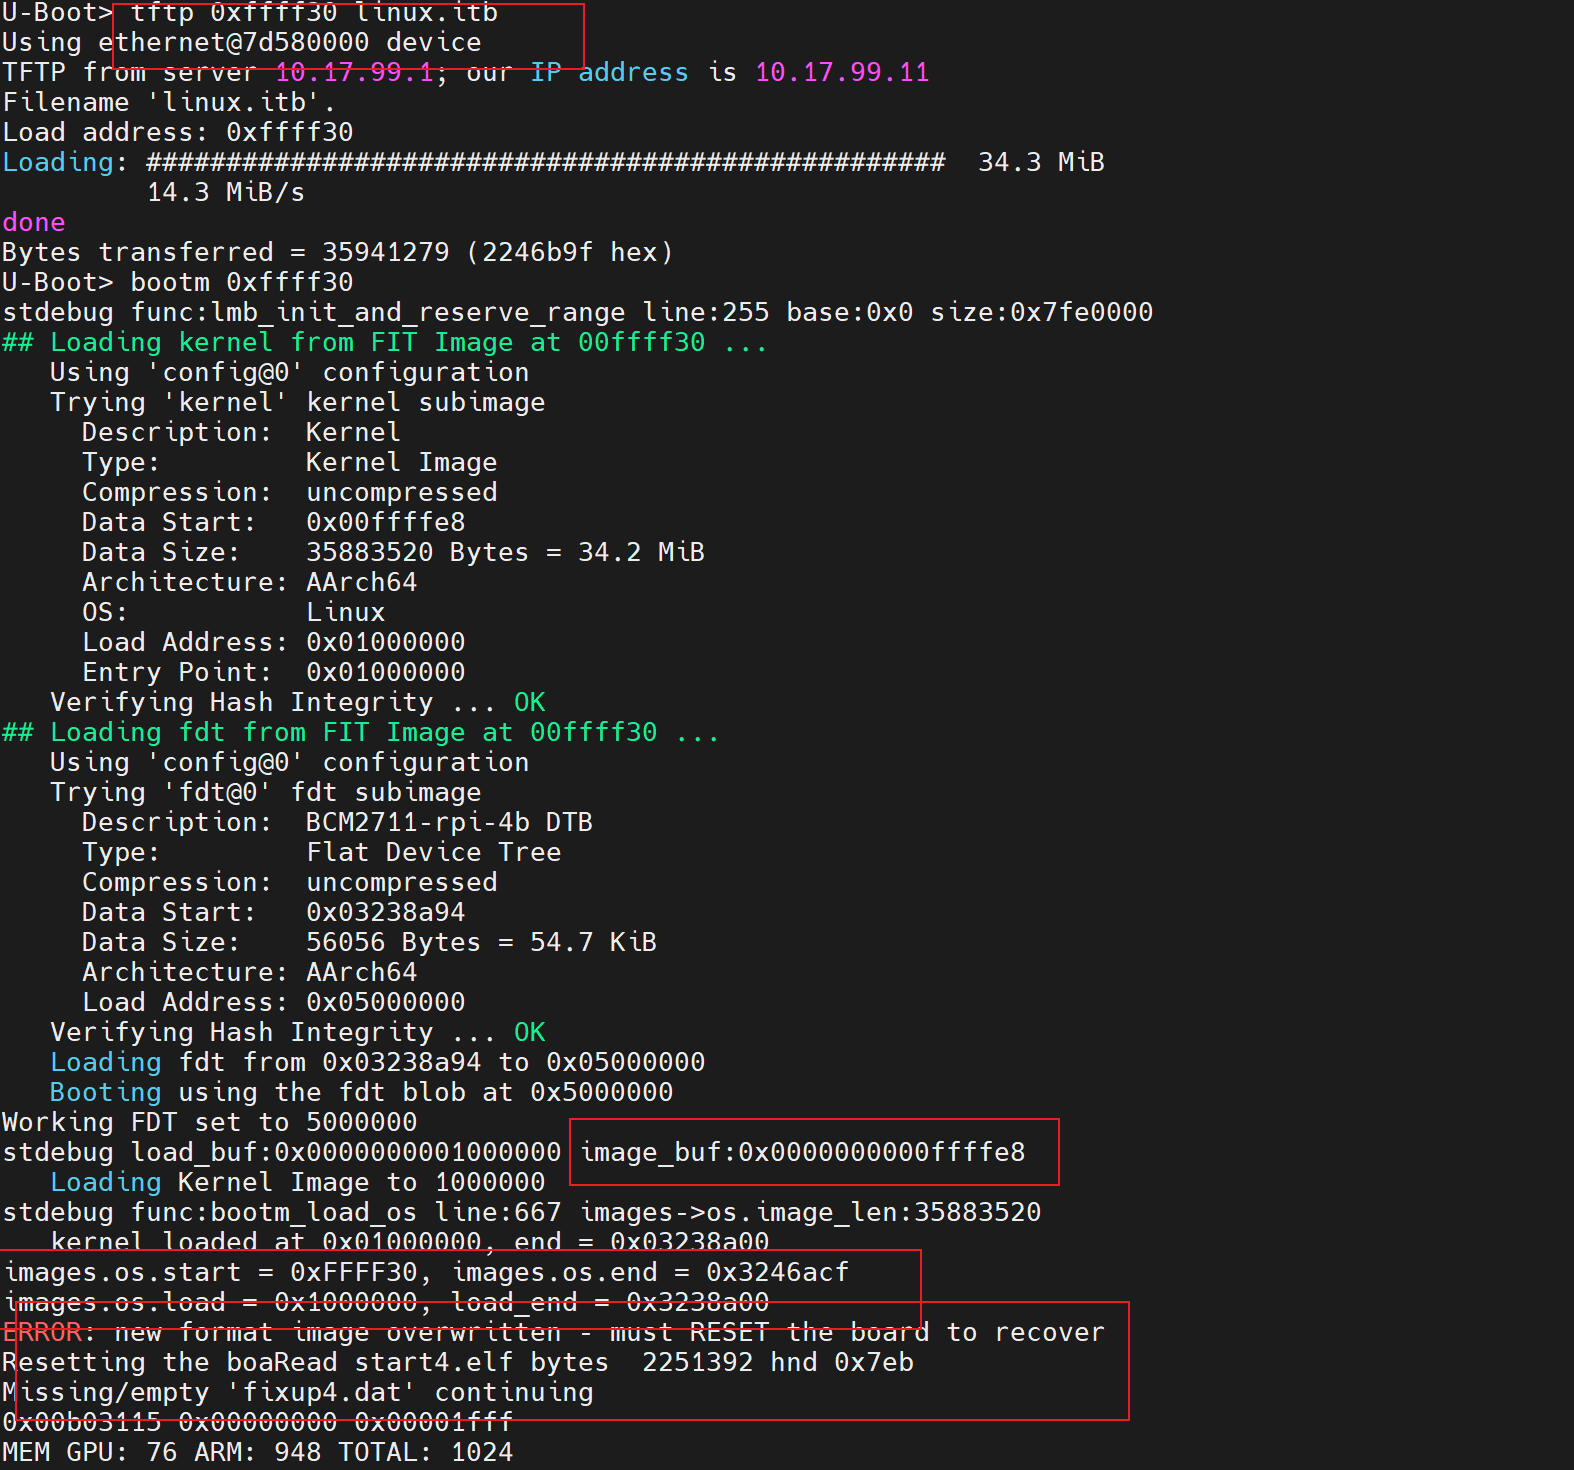
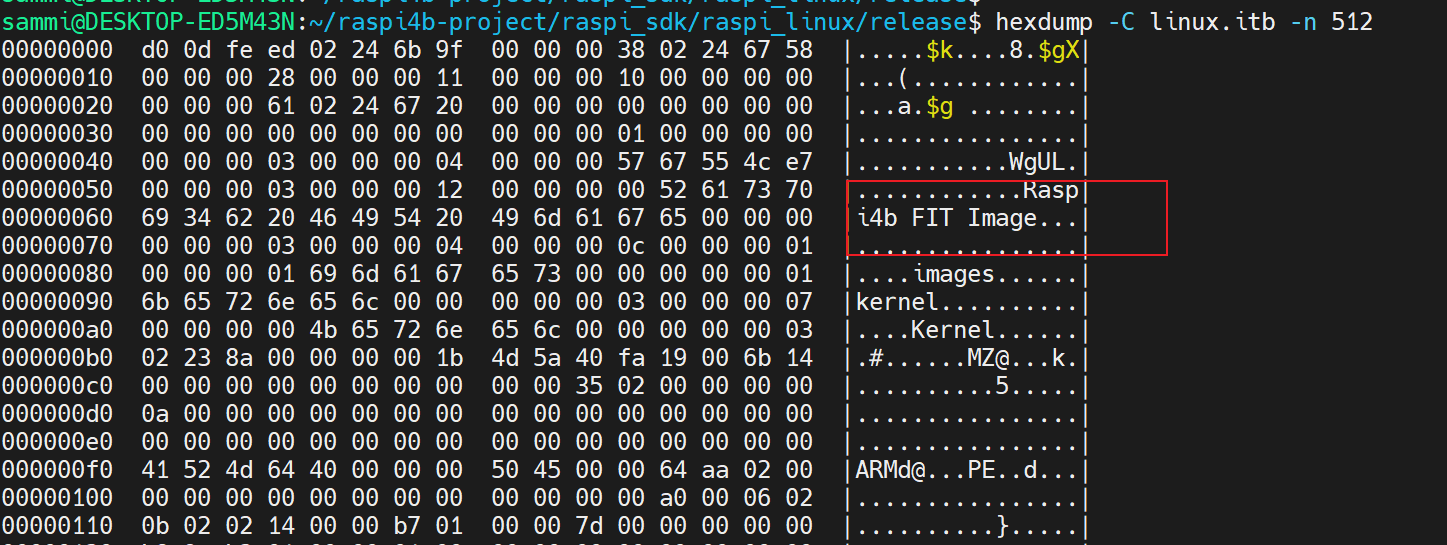
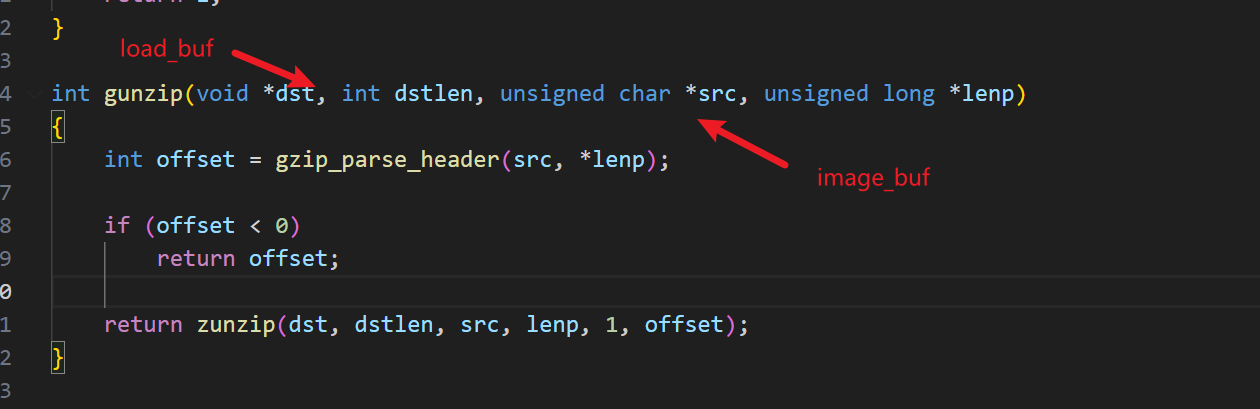
最后将bootm.c中相关的地址打印出来,如上图的打印,发现当我们将FIT下载到0x1000000地址的时候,会发现实际的FIT的头占了0xb8的大小,然后灵光一闪,将load的内存地址改为0x1000000 - 0xb8后即可。
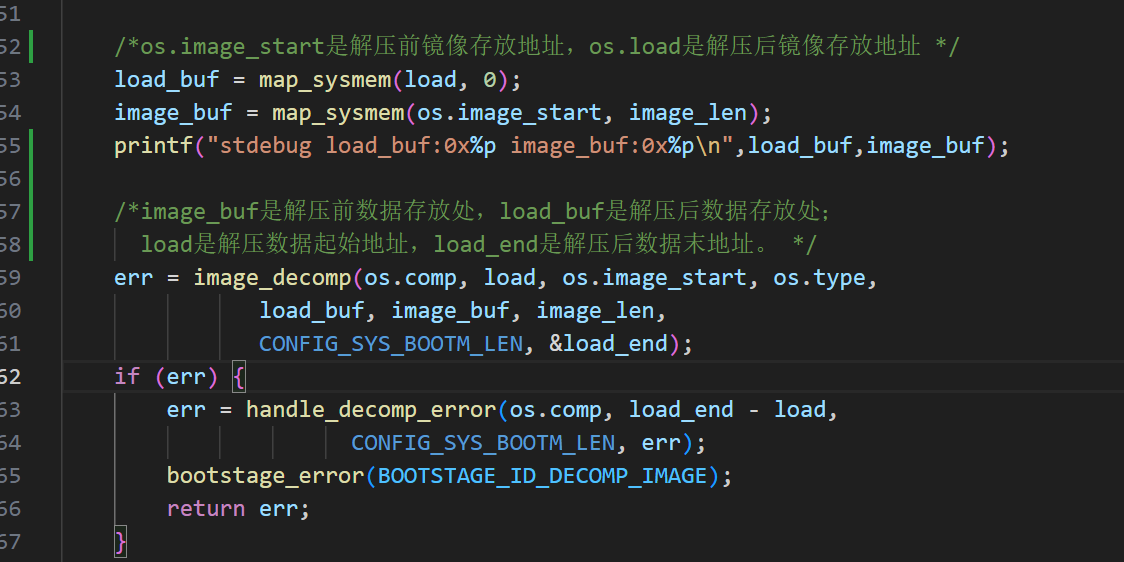
从图上的出错日志可以看出这里的start,end,load,load_end是对应不上的,所以出错了?那其实是不是只要保证这个load的地方能保留好FIT的头即可了?
但是这里留着超过的了,却不行
最后证明确实就是跟FIT的开头占了多少有关系。。。。。而且这个开头多大,还跟你its文件的字符有关系呢
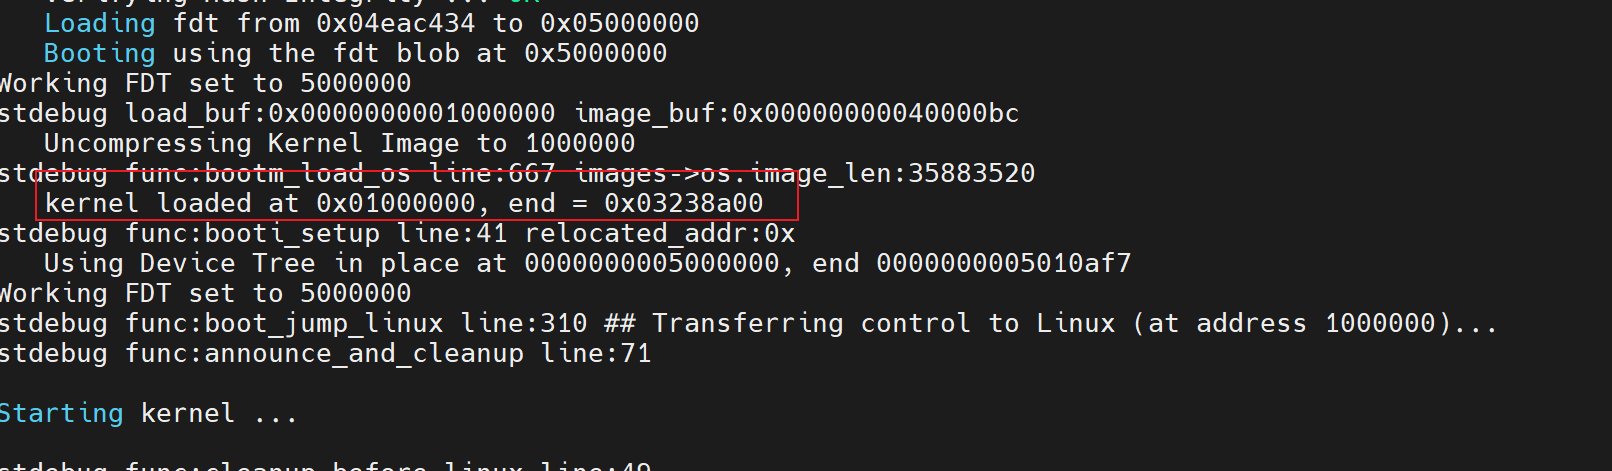
那为啥压缩的就可以不遵循这个bootm addr ,addr = load_addr - FIT_header呢?我们压缩后的镜像是大概14M多,而设备树地址是在0x5000000,刚好距离我们的load地址0x4000000的大小为16M。我们从0x40000bc开始解压,解压后的数据就放到0x1000000,然后解压后的数据末尾为0x3238a00,刚好没有踩地址0x4000000。所以这个0x4000000这个地址上下都非常的极限。
反正对于压缩的镜像,bootm addr中的addr,保证要两点
addr放压缩镜像的内存,不踩FDTlinux解压后的地址,比如图中的load end = 0x3238a00,不要踩到addr
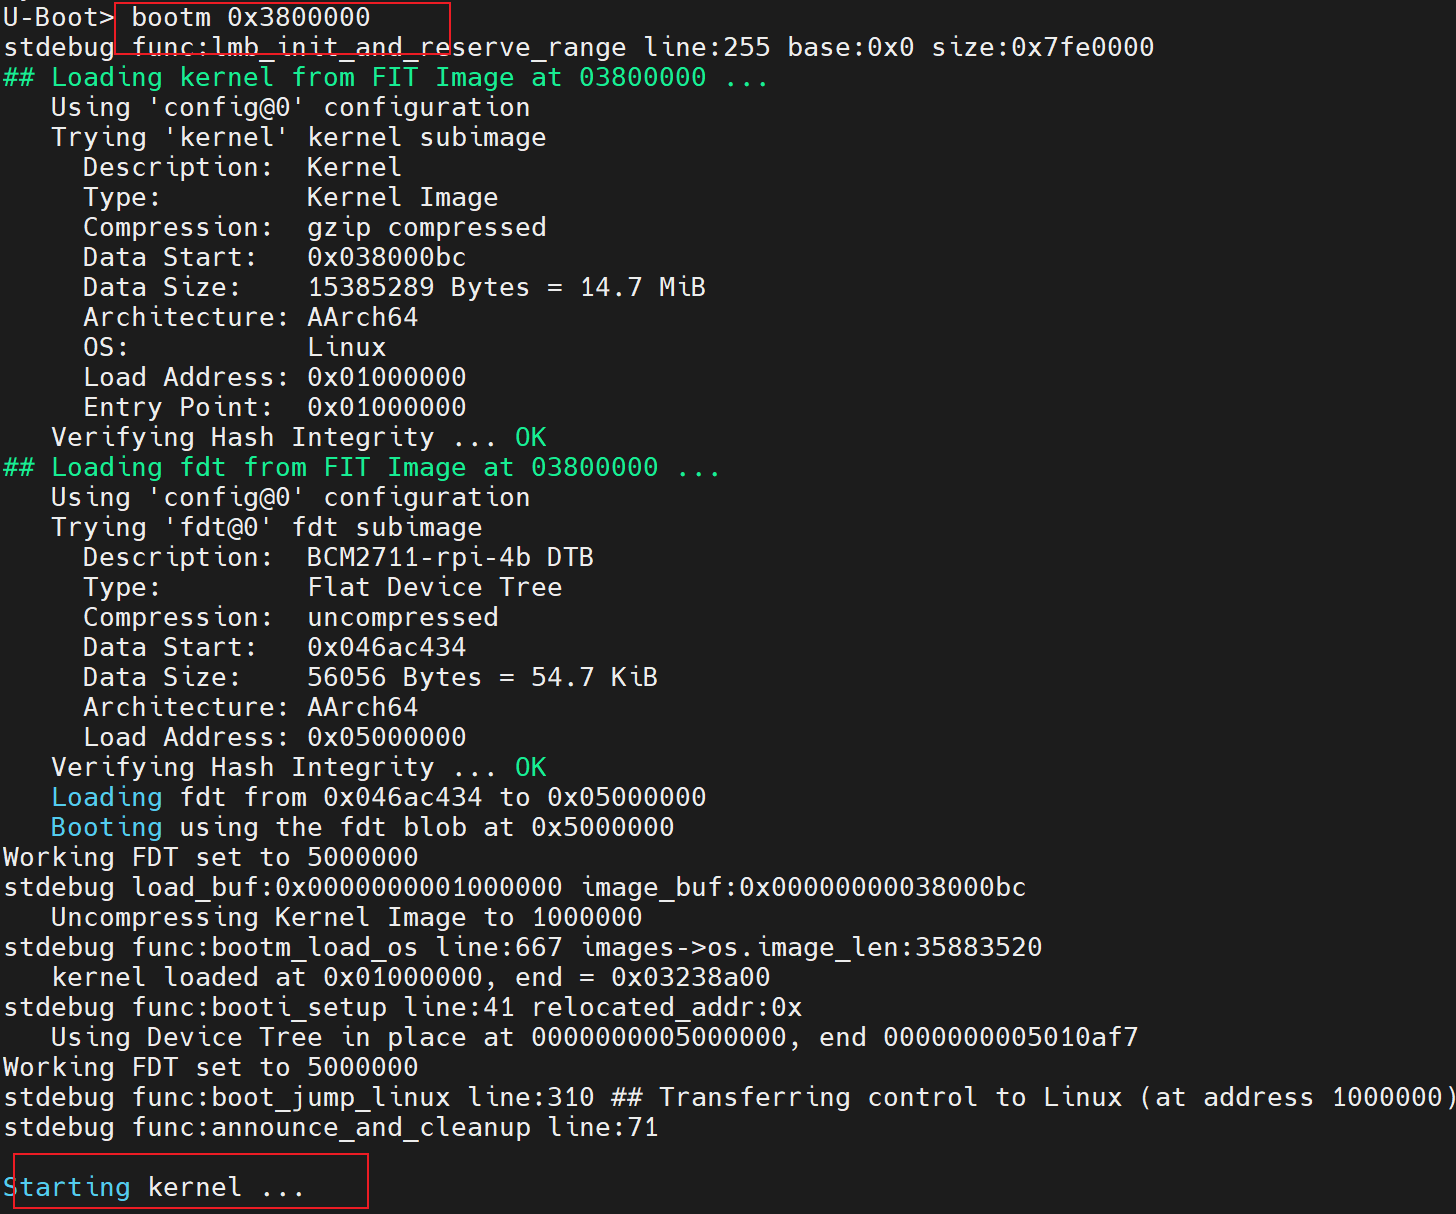
按照这个约束,其实bootm 0x3800000也是可以的
那能不能就是压缩的镜像跟不压缩的镜像那样,也开头留好FIT的头部大小呢?那不行呀,image_buf对于压缩的镜像来说就是src地址,怎么还能原地解压不是?
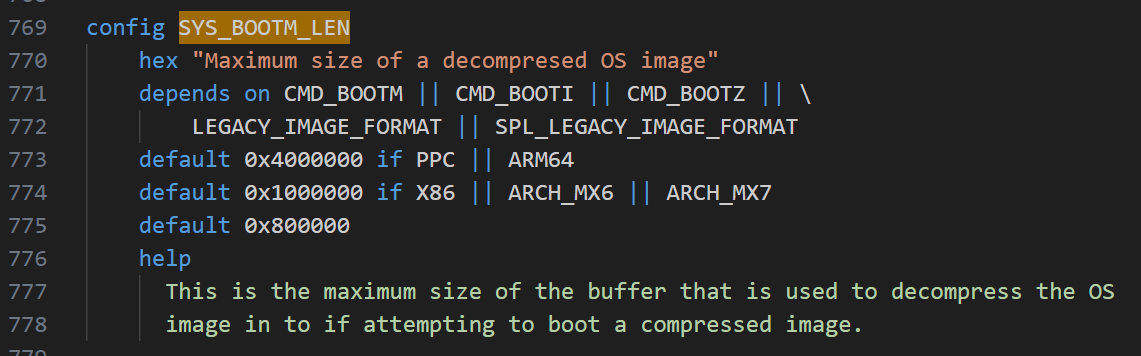
另外,目前树莓派支持镜像解压能申请到的的内存大小为0x4000000,这个是由CONFIG_SYS_BOOTM_LEN这个宏来控制的,对于非解压的镜像,不用考虑这个CONFIG值